Cursor for Vibe Coding: A Complete Guide

What is Vibe Coding?
Vibe coding is an AI-assisted way of programming where you describe a problem or application in natural language and let an AI system generate the code to solve it. In practice, this means you tell the computer what you want in simple terms – for example, “I need a webpage that shows a friendly welcome message and today’s date” – and the AI will try to write the necessary code for you.
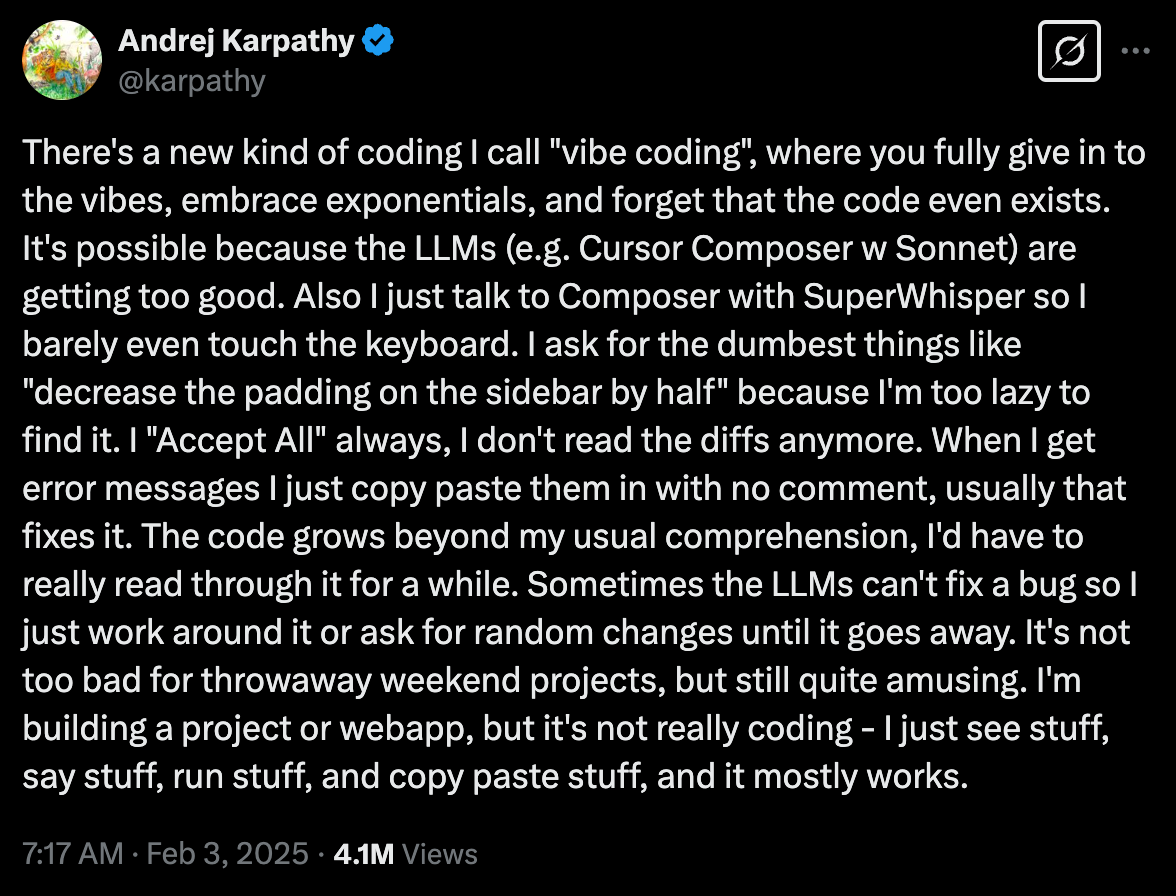
Vibe coding shifts the role of the programmer from writing detailed code to guiding the AI with high-level instructions and ideas. As Andrej Karpathy jokingly described his experience, “It’s not really coding – I just see stuff, say stuff, run stuff, and copy-paste stuff, and it mostly works.”
Introduction to Cursor
Cursor is an AI-driven code editor that is built to make vibe coding easy and intuitive. In simple terms, Cursor is a program on your computer where you can write or generate code with the help of an AI assistant. It looks and feels much like a normal coding environment, but it has intelligence built-in to understand instructions in plain English and generate code accordingly. Cursor has been described as “the AI Code Editor” because it tightly integrates AI into the coding workflow, allowing you to “write code using instructions” instead of typing everything manually.
Some of Cursor AI’s main features and functionalities include:
- AI-Powered Code Generation – You can type what you want (in natural language), and Cursor will convert those requirements into actual code for you. This dramatically reduces the amount of manual coding you need to do.
- Automated Debugging Assistance – Cursor can identify errors or bugs in the code it generates (or even code you wrote) and suggest fixes, making the debugging process faster and less frustrating.
- Context-Aware Help – The AI in Cursor isn’t working blindly; it actually understands your project’s context. It can look at all your files and make suggestions that fit your project, ensuring the generated code is consistent with what you already have.
- Documentation and Learning Tools – Cursor offers quick lookup of documentation and can even explain code to you. For example, if you see some code and aren’t sure what it does, you can ask Cursor and it will provide an explanation or relevant documentation links.
In short, Cursor AI acts like a smart co-pilot for coding: it helps you generate new code, complete what you started writing, fix problems, and answer questions – all within one familiar editor interface. It’s built on technology similar to ChatGPT, but specialized for programming tasks, which means it can handle coding queries and produce solutions that a regular text assistant might not easily provide. For a beginner, this means you have a tool that can turn your ideas (described in plain language) into working code, and also help you understand and refine that code along the way. Cursor is designed to be “intelligent, fast, and familiar”, giving you the power of AI in a user-friendly code editor.
Tutorial: Using Cursor AI for Vibe Coding
Now, let’s walk through how you can start vibe coding with Cursor AI. We’ll go step-by-step from installing Cursor to actually generating code with natural language prompts. We’ll also look at an example project to see how a beginner can create something with Cursor’s help.
Installation and Setup
Getting started with Cursor is straightforward. Follow these steps to install and set up the Cursor AI editor on your computer:
Download Cursor – Go to the official Cursor website and download the application for your operating system. The site will usually detect if you’re on Windows, Mac, or Linux and give you the correct installer file automatically. Simply click the “Download” button on the site.

Run the Installer – Once the download is complete, run the installer file. Install Cursor just like you would install any other app.
Launch Cursor – After installation, open Cursor AI. The editor will open up, presenting a interface similar to other code editors (if you’ve seen Visual Studio Code, it will look familiar).
Initial Configuration – On the first launch, Cursor may ask you to configure a few things. Don’t worry – you can mostly accept the defaults. It might prompt you about keyboard shortcuts, the language you’ll use to talk to the AI (e.g. English), and whether to enable project-wide indexing (which helps the AI understand your entire project). If you’re not sure, you can go with the default settings and change them later in preferences. Cursor might also ask if you want to import any settings from VS Code (this is optional and mainly for users who have coding experience with that editor).
Sign Up / Log In – To use the AI features, you’ll likely need to create a Cursor account (if you haven’t already). You can sign up with an email or log in using Google/GitHub. There is a free tier that allows a limited number of AI completions per month, which is usually enough to try things out. New users often get a free trial of the Pro features for a couple of weeks, so you can experience the full capabilities initially. After logging in, you’re all set – you should now have Cursor AI ready for vibe coding!
Generating Code with Natural Language Prompts
With Cursor installed, you can now start vibe coding – that is, generating code by describing what you want in plain language. Here’s how you can do that in Cursor AI:
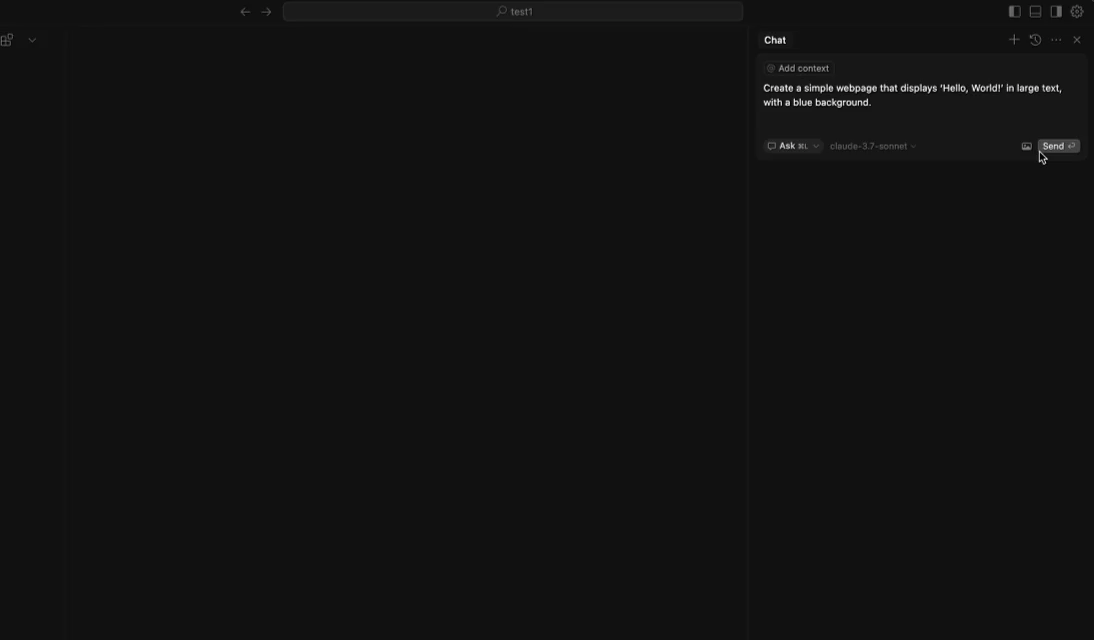
Open the AI Prompt or Chat – In the Cursor editor, you’ll have an AI assistant ready to help. You can activate it by opening a chat panel or prompt box. For example, pressing a shortcut like Ctrl+L (Cmd+L on Mac) opens a sidebar chat where you can talk to the AI, and Ctrl+K opens an inline prompt for code generation. (Don’t worry about memorizing shortcuts – you can also click on an on-screen icon or menu option to activate the AI assistant.)
Describe What You Want – Once the AI chat or prompt is open, just type in your request in regular English. Be clear and specific about what you need. For instance, you might type: “Create a simple webpage that displays ‘Hello, World!’ in large text, with a blue background.” There’s no special syntax needed – just explain the idea or feature you want. This natural language instruction is the core of vibe coding. When you’re done typing the prompt, send it (by pressing Enter or clicking a “Generate” button).
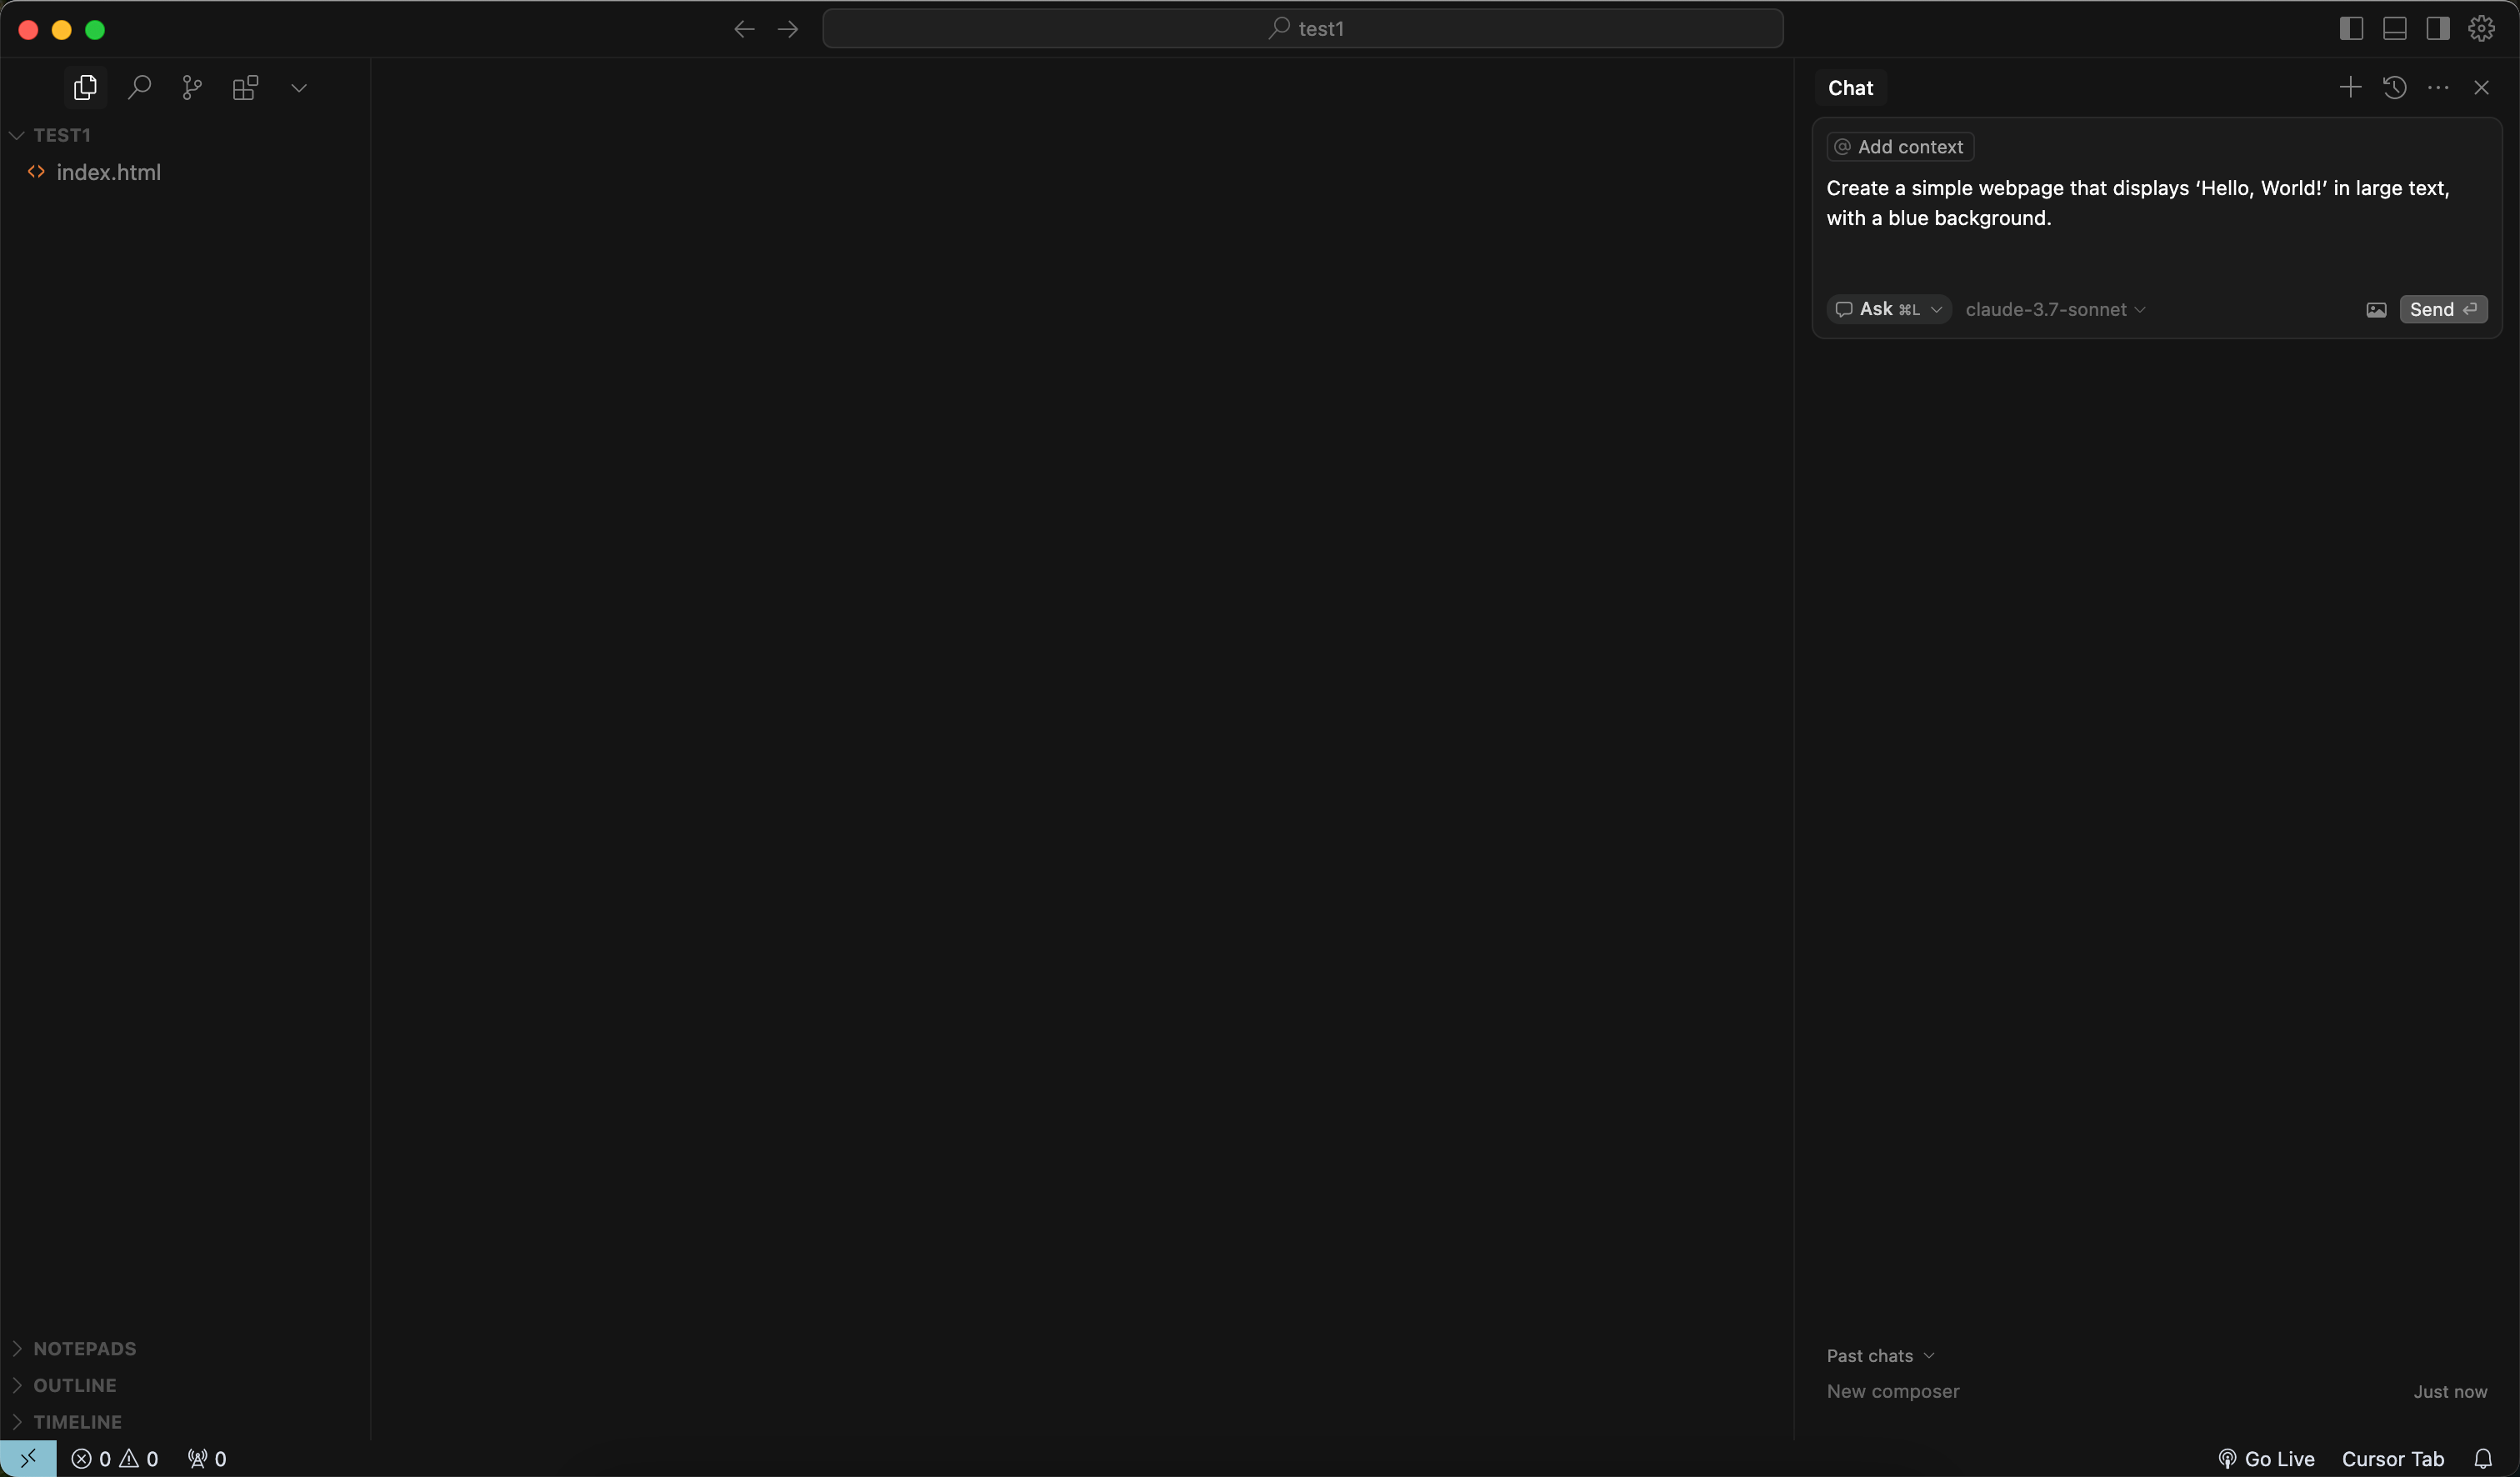
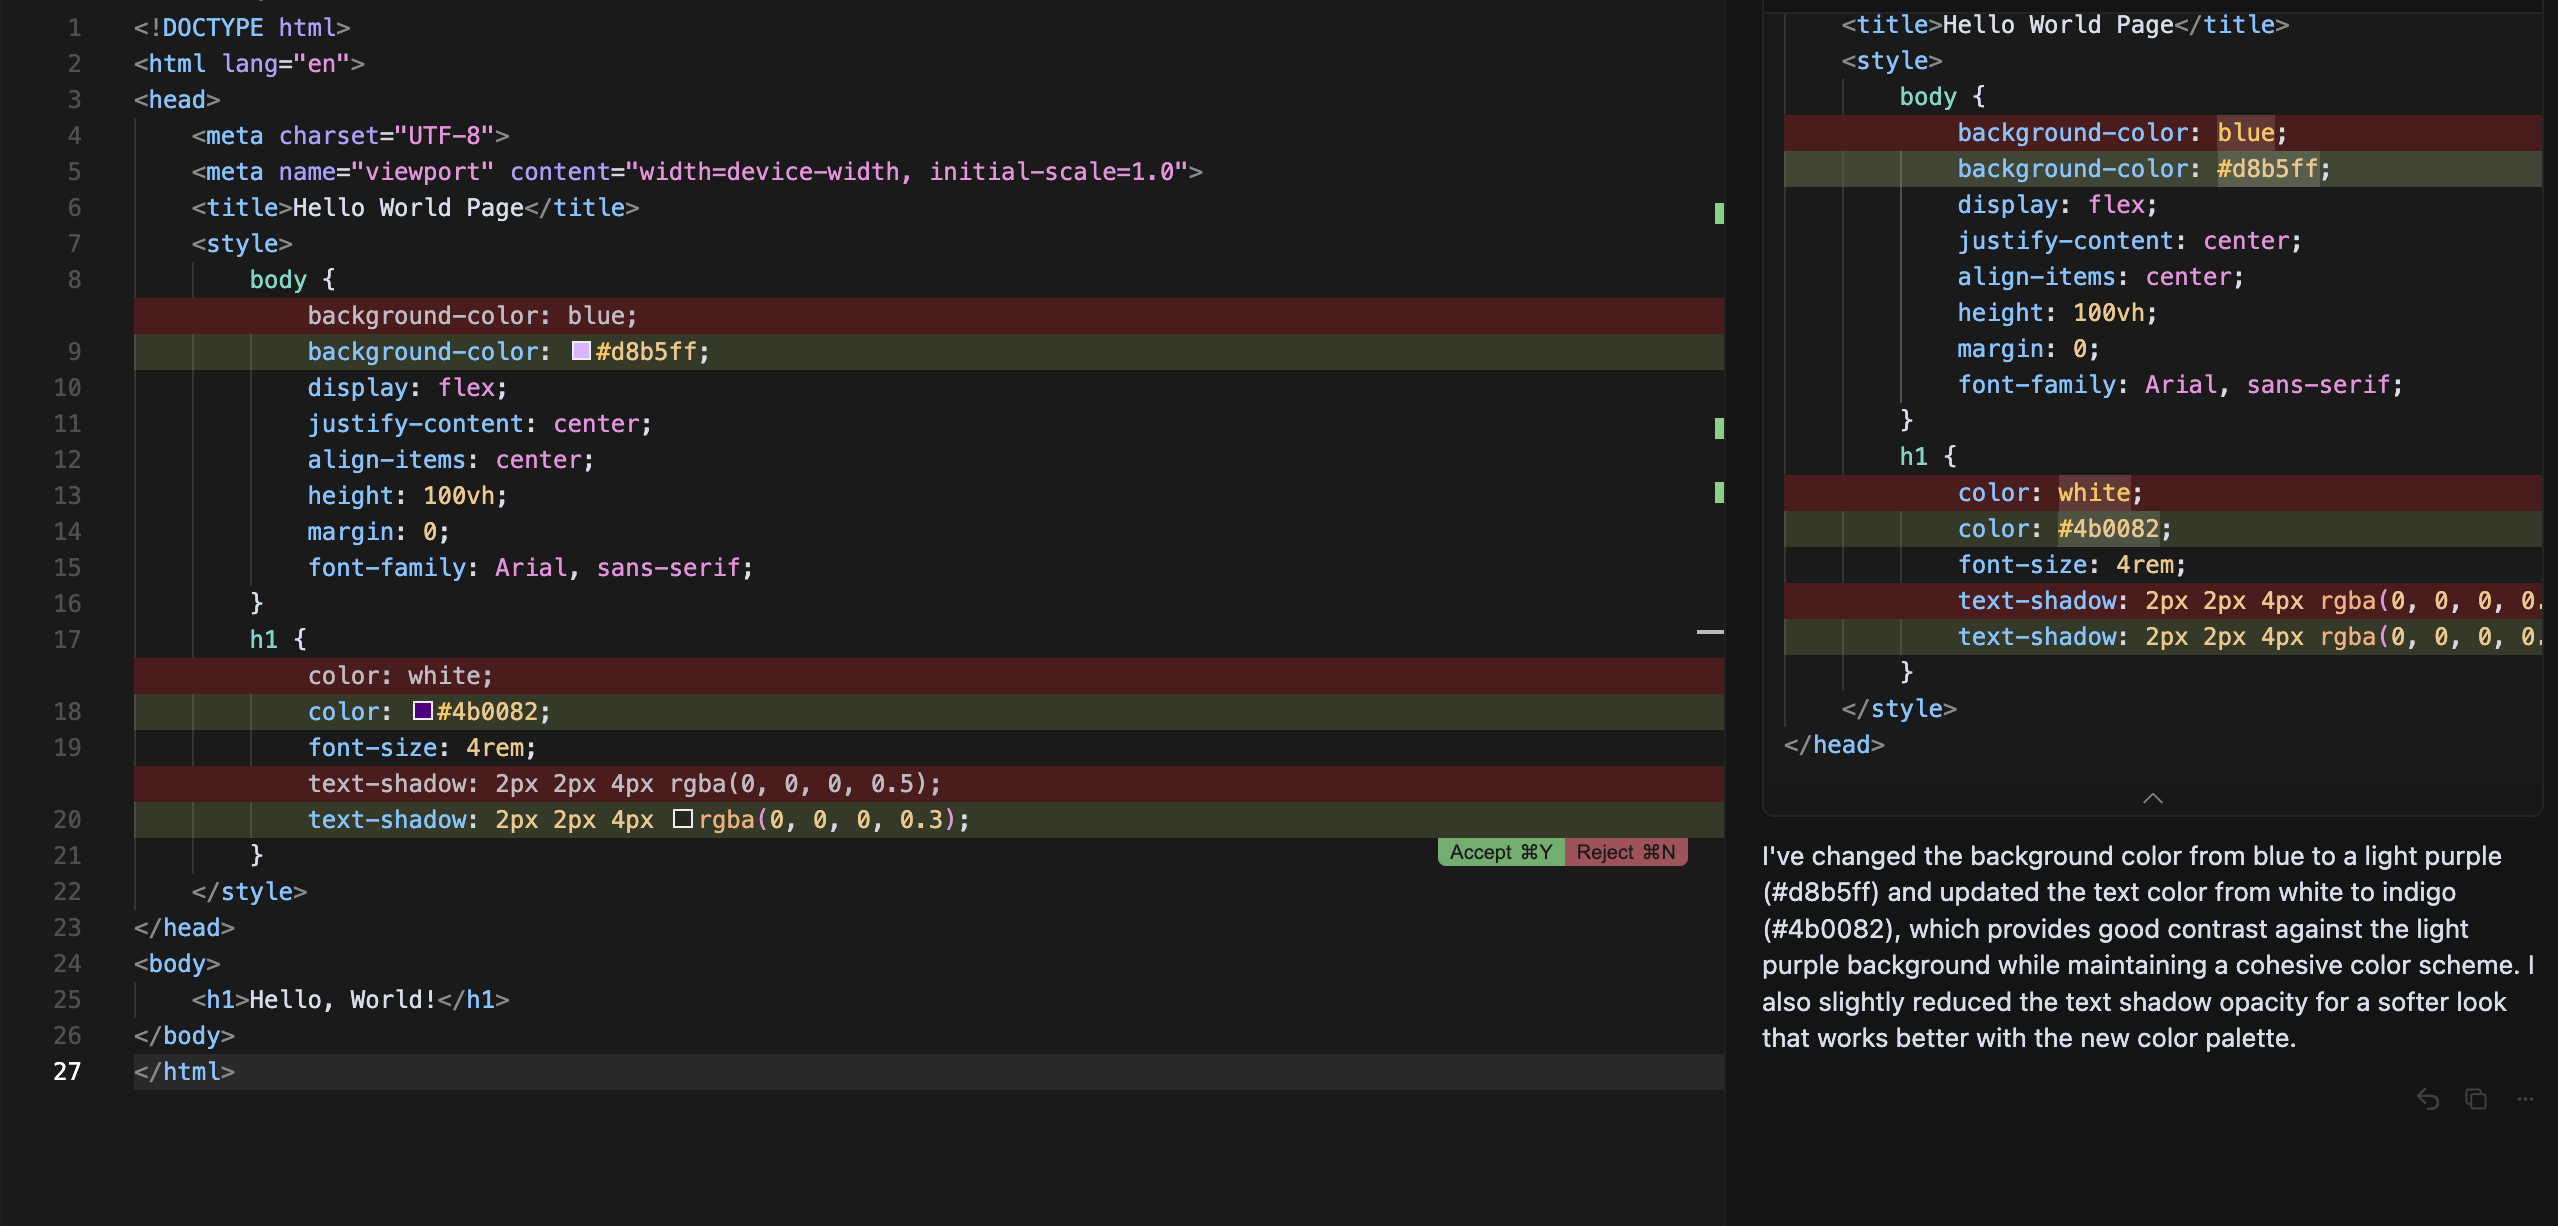
Let the AI Generate the Code – Cursor’s AI will now process your prompt. In a moment, it will present you with code suggestions. If you started a fresh file, it might show the entire code to implement your request. If you were working inside a file, it might show a snippet or changes (for example, adding new lines of code). The AI might even explain what it’s doing as it generates the code, so you can understand the output.
Review and Accept the Code – After generation, the suggested code might appear in a preview or diff (difference) format. Take a look at what the AI wrote. If it looks correct, you can insert it into your project by clicking an “Accept” or “Apply” button. For example, Cursor may highlight the new code in green – indicating these are the lines it will add – and you just confirm to accept them into your file. If something isn’t quite what you wanted, you can tweak your prompt and try again, or edit the code manually. Remember, you remain in control – you can always decline a suggestion if it’s not right and ask for a new approach.
Run or Test the Code – Once you’ve accepted the AI’s code into your project, you can run it to see the results (this might involve switching to a terminal or using Cursor’s built-in terminal if it has one). For a webpage example, you’d open the HTML file in a browser to check it. If it’s a small program or script, you can run it to make sure it works as expected. Testing the output is important, especially since you want to verify the AI interpreted your instructions correctly. If you find an issue, you can go back and ask Cursor to fix it (for example, “fix the error that happens when I click the button”) – the AI can generate a correction for you.
That’s the basic cycle: prompt → generate → review → accept → test. You can repeat this cycle to build your project piece by piece. As you get more comfortable, you can also use additional features: for instance, you can highlight a piece of code and ask the AI to explain it or improve it. Cursor will then show an explanation or a refined version of the code which you can apply.
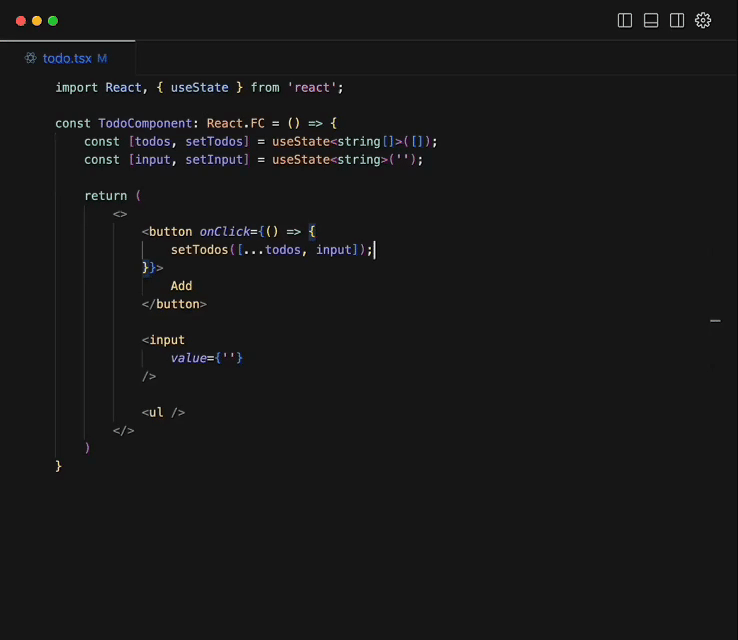
It even has an autocomplete feature where as you type, it predicts the next part of code (you can press Tab to accept suggestions), which can speed up manual coding greatly. But as a beginner, you can rely mostly on the chat/prompts until you feel adventurous to try these extras.
Best Practices for Vibe Coding with Cursor
Using Cursor can feel like magic, but to get the most out of vibe coding, keep these best practices in mind. They will help you work smoothly and efficiently, especially as a beginner:
- Describe Your Intent Clearly: When prompting the AI, be as clear and specific as you can about what you want. For example, instead of saying “make something cool,” specify “create a webpage with a header that says ‘Welcome’ and a button that says ‘Click me’.” Clear instructions help the AI understand your vision better.
- Take It Step by Step: Break your project or problem into smaller tasks and address them one at a time. Vibe coding works best as an iterative process. Start with a basic version of what you want, then gradually add features or improvements with new prompts. For instance, first get a simple page working, then ask Cursor to add a feature like form input, then styling, and so on. This way, if something goes wrong, it’s easier to pinpoint and fix.
- Review and Test Often: Even though the AI writes the code, it’s important to test the code to make sure it does what you intended. AI can occasionally misinterpret instructions or produce code that has minor bugs. Run your program or open your webpage to see if it behaves correctly. If you encounter an error or something isn’t right, you can ask Cursor to help fix it. Keep in mind that code quality and correctness still matter – AI-generated code isn’t guaranteed to be perfect, so a quick review or test can save you confusion later. You don’t need deep technical knowledge to test; just use the app as a user would, and see if it works.
- Refine Your Prompts Based on Results: If the AI’s output isn’t what you expected, don’t be discouraged. You can simply rephrase your request or add more detail. Cursor might give different results for the same prompt sometimes, so adjust your instructions to guide it toward what you want. For example, if it made something slightly off, you can say, “That’s close, but please also do X,” or “Use a different approach for Y.” This back-and-forth is normal – think of it as collaborating with the AI.
- Leverage Cursor’s Guidance Features: Remember that Cursor can do more than just spit out code. You can ask it questions like “What does this piece of code do?” or “How do I add a dropdown menu here?” in the chat. It can provide explanations in simple terms, which is great for learning. It can also suggest improvements if you prompt it with something like “Improve the readability of this code” or “Optimize this function.” Using these features can help you not only get the job done but also understand the process.
- Be Mindful of Limitations: While vibe coding is powerful, know that complex projects might still require some traditional coding or troubleshooting. Sometimes the AI might not get a very intricate requirement exactly right on the first try, or it might need guidance on specifics (like which color scheme you prefer, or which algorithm to use for a complex task). Be patient and ready to iterate. Also, if Cursor ever seems confused or produces an error, you might need to break your request into a simpler form or double-check if your prompt could be interpreted in another way.
- Keep Learning by Doing: Finally, treat each AI-generated solution as a learning opportunity. Over time, you’ll start recognizing patterns (for example, “Oh, that’s how a form is created in HTML” or “I see, to read a file in Python the AI used this function”). This will help you craft even better prompts and maybe inspire you to tweak some code yourself. You don’t need formal programming lessons to enjoy vibe coding, but picking up little bits of knowledge as you go will empower you to tackle bigger and more interesting projects with Cursor AI’s help.
By following these best practices, you can ensure a smooth experience with Cursor. Vibe coding is all about collaboration between you (providing the ideas and goals) and the AI (doing the heavy coding work). With clear communication and a bit of curiosity, you’ll be able to bring your app ideas to life and maybe even have fun learning a bit of coding concepts along the way – all without having to write code the traditional way. Happy vibe coding!